SSIS Merge Join Task
SSIS Merge Join to Compare 2 Excel Files
This article details how to compare 2 Excel Files - one with the data from a previous date and a current file with data that has been updated, deleted, or added to the file. This started because one of my bosses was bugging me about providing a report just showing what had changed between Excel File #1 and Excel File #2. Unfortunately, Excel does not have the very handy Compare option that Word does. I had imported both files into SQL Server or MS Access and compared the rows to provide a new Excel file and done manual comparison in Excel of the differences between cells using IF in a formula in another Sheet, but this was extra work that did not need to be done. This solution in SSIS leaves the files in their native format and with just a few steps through a Merge Join and a Conditional Split, I can produce the needed Excel file that summarizes the changes made between the original file and the new file very quickly.
Review of the Excel Files to be Compared
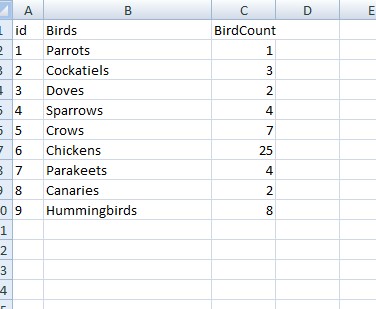
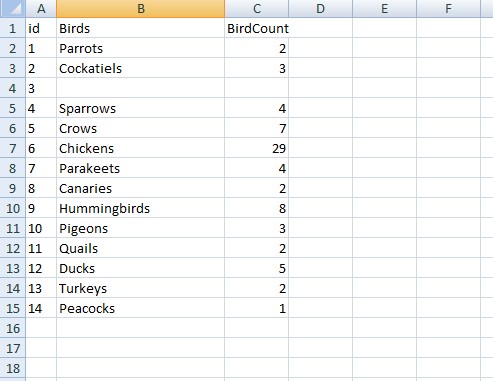
For this example, I have created 2 Excel files. One has the "original" data with an ID column of all of the Birds by Type and Count in it. The 2nd file contains the altered data - same ID column with changes to some of the counts, removal of some types of birds, and additions of new bird types and their counts.
Sql Server Data Tools Tasks - SSIS
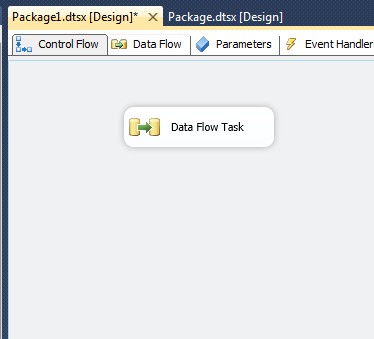
Open up SQL Server Data Tools (the version used here is for SQL server 2012 \ Visual Studio 2010). Add a Data Flow Task to the Package on the Control Flow Tab.
Setting up the Source Connections
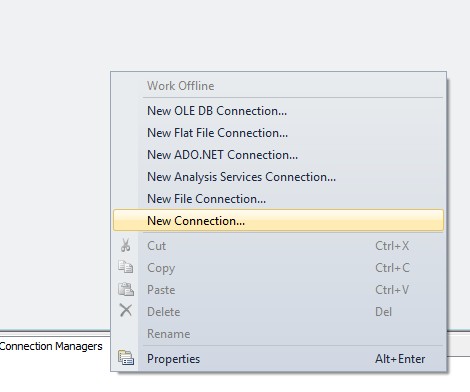
Set up the Connections to the Excel Files: In the Connection Managers section, Right click and select Add new connection.
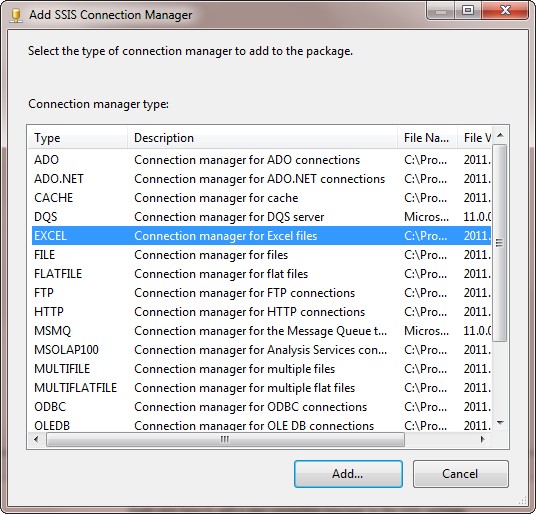
Select Excel from the list Browse to the location of the file. Repeat for ExcelFile2.xlsx
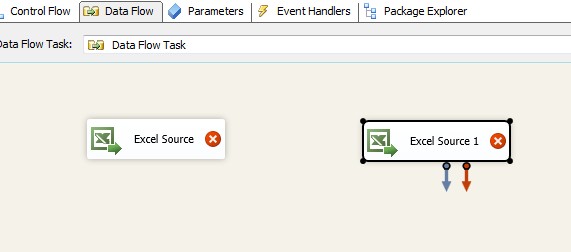
In the data flow tab, add 2 Excel Sources - 1 for File 1, another for File 2. Right click on the 1st one and select Edit.
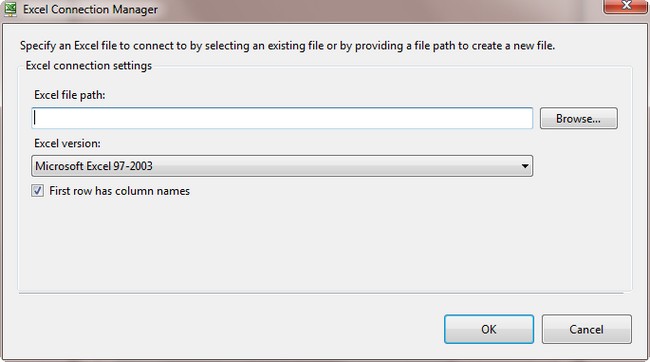
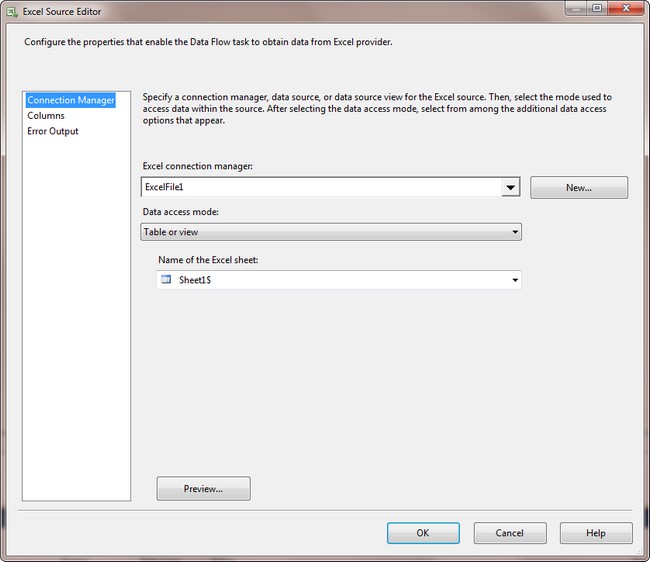
Browse to the location of the file and select the Sheet.
Select the file from the Connection Manager drop down and select the Sheet Name.
Adding the Merge Join
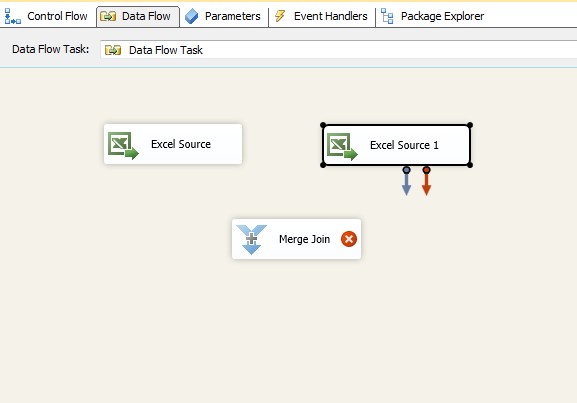
Add a Merge Join task to the data Flow tab. Right click on the Excel Source and select Show Advanced Editor. Click on the last tab and highlight the Excel Source Output.
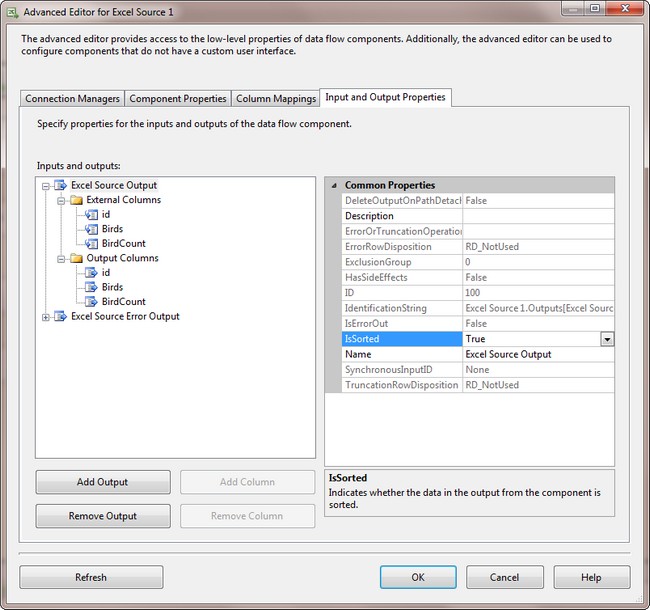
In the Common Properties box, click next to IsSorted and change it to True.
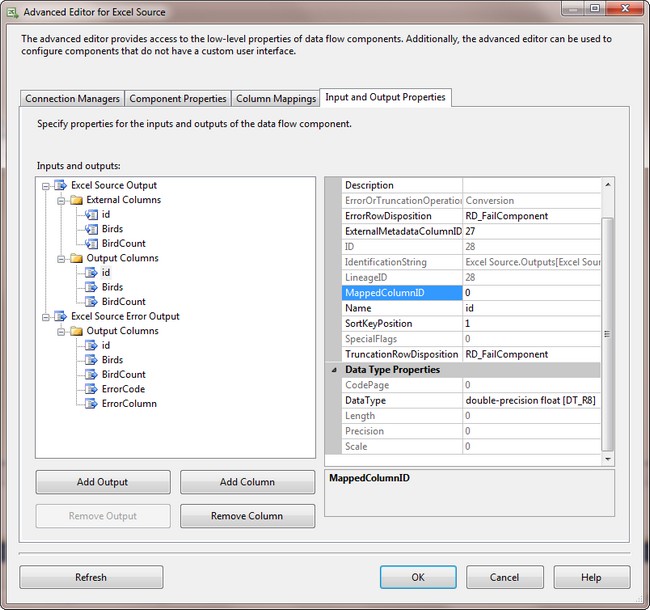
Highlight the Output Column "id" and change SortKeyPosition to 1. Repeat this for Excel Source 1. The Data Source must have a Sorted column for the Merge Join task or you will get an Error Message.
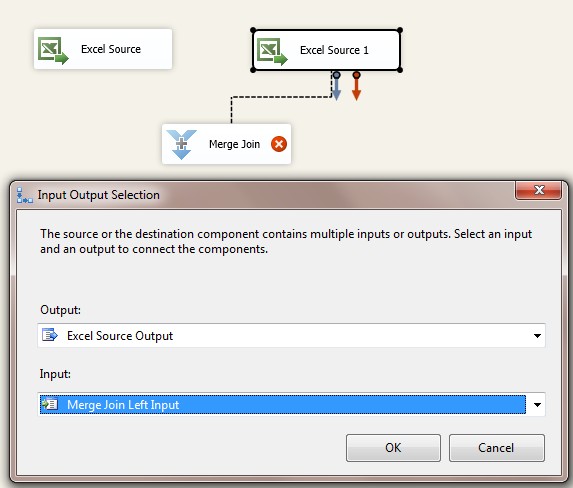
Drag the blue arrow of the Excel Source 1 to the Merge Join.Select Full Left Join from the drop down box. Drag the blue arrow from Excel Source to the Merge Join and then Right Click on the Merge Join Task and select Edit.
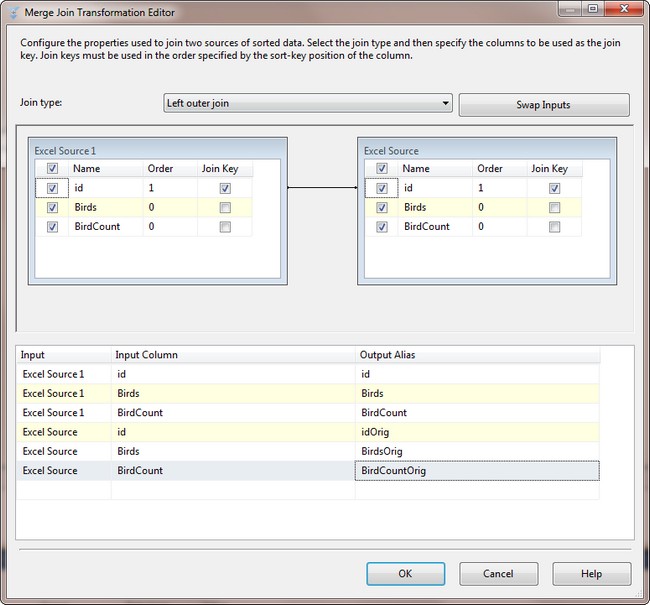
Select the columns from both Sources and change the drop down at the top to Left outer join. If you forgot which Excel source had the most recent data and you had the original file as the main file for your Left Outer Join, you can click on the Swap Inputs button to change the Sources.
Adding the Conditional Split
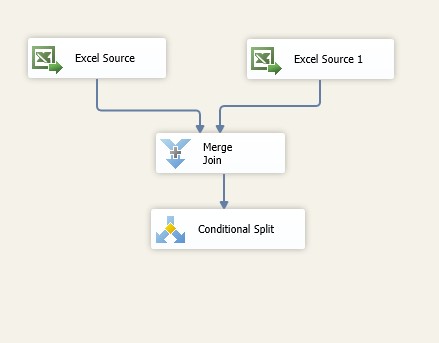
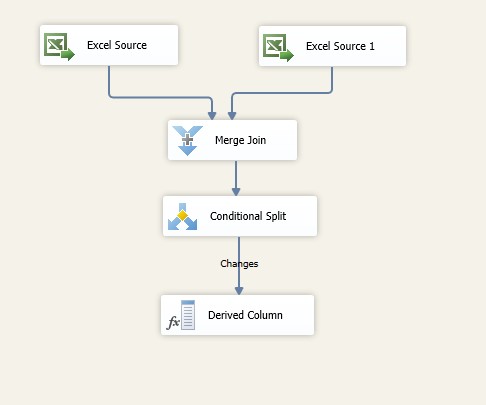
Drag and drop a Conditional Split on the Data Flow tab and drag the blue arrow from the Merge Join to it. Right click on the Conditional Split and select Edit.
Add an Output Name to test for changes in the Bird Count, if anything has been removed (the Birds column would be Null), or if anything has been added (the IdOrig column would be Null).
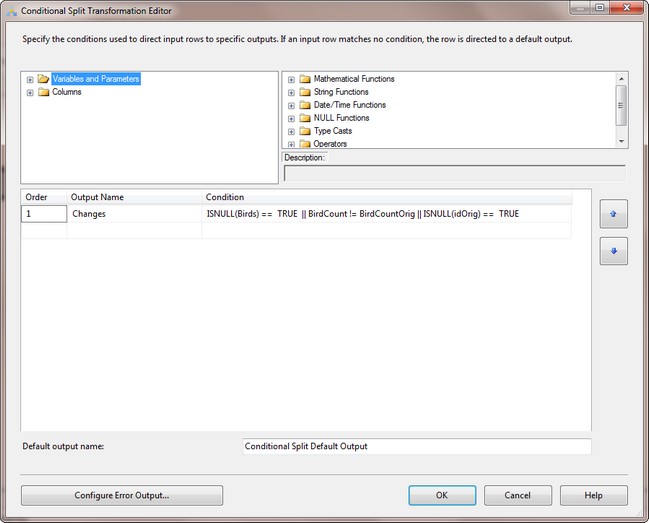
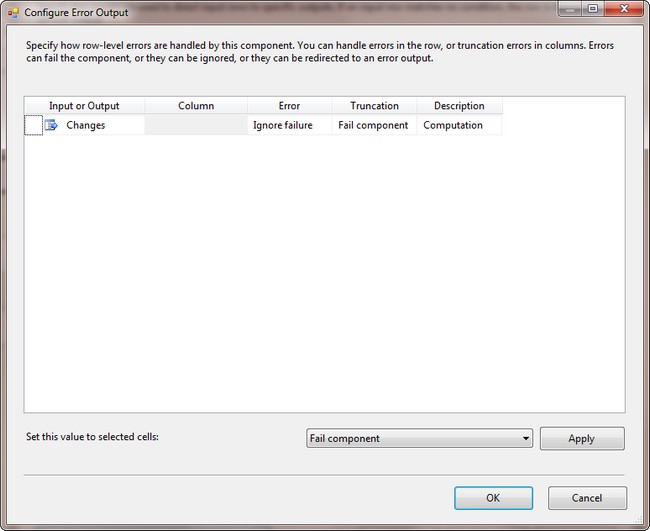
Make sure to set the Error on the Changes item to Ignore Error when configuring Error Output. The expression for Changes will evaluate to NULL for items that do not meet any of the criteria. This will result in an error when debugging or running the Package.
Adding a Derived Column
Add a Derived Column item to the Data Flow.
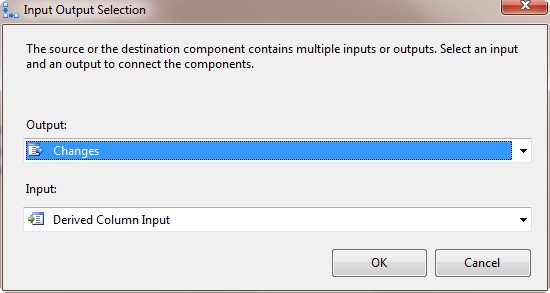
When you drag and drop the blue arrow onto the Derived Column task, a pop up will appear to ask you which output from the Conditional Split to use. The Changes Output is the information that we need.
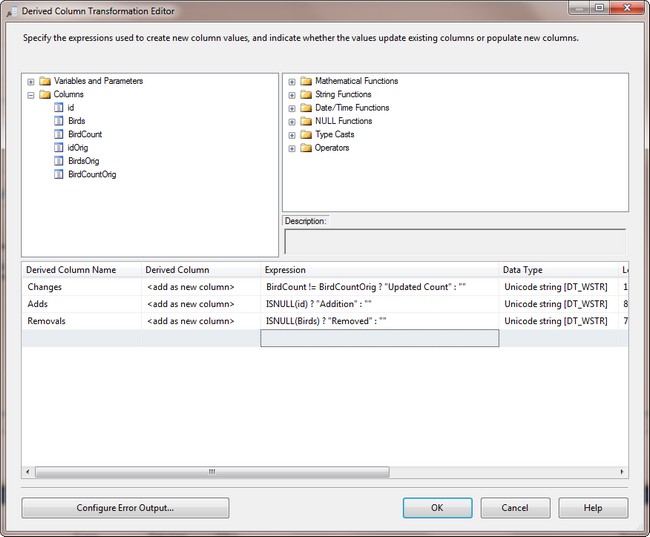
Add 3 new Derived Columns, one for the Adds, one for Changes, and one for Deletes. The syntax in the Expression box is a Ternary Operator where IF the condition stated is True, then do whatever is listed immediately following the "?". IF the condition is False, then do whatever is listed on the opposite side of the colon ":".
Adding the Final "Change" Capture Excel File
Add another Connection for an Excel file called Changes. This file will have columns from both Sources and the 3 Derived columns. Add an Excel Destination to the Data Flow and set it to this new Connection. Set the mappings up between the Derived column item and the Excel Destination.
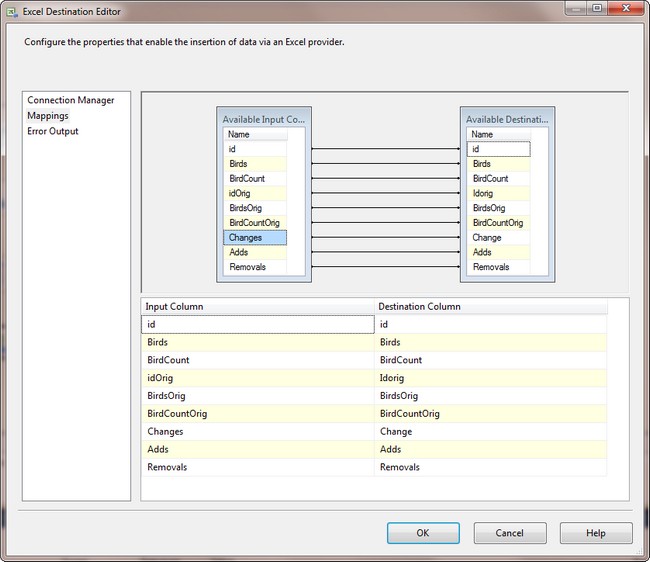
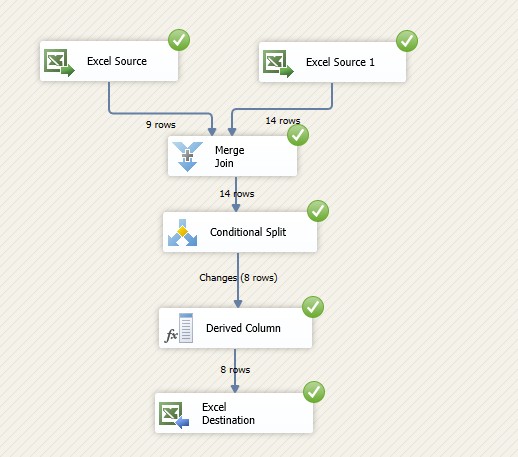
Run the SSIS job to confirm that it works.
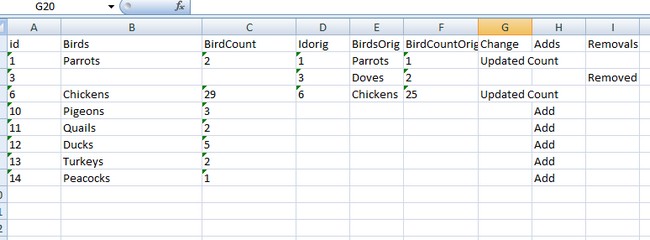
By opening the Changes file, we can see what the differences are between the 2 files.
