Excel Lesson Plan
Spreadsheet and Simple Chart
Assignment - Fruit Stand Shopping List: Students have decided to raise funds to help needy children pay for school supplies. They will make and sell fresh fruit juices and smoothies at the next important school event. Students choose at least 8 items from the Fruit Stand Shopping List for their fruit juice and smoothie creations. Students create a basic spreadsheet and simple bar chart illustrating their choices.
How to Create Your First Chart - Video Tutorial
Time to learn = 25 seconds
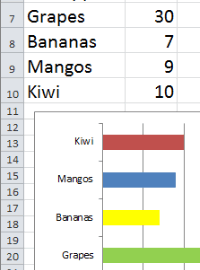
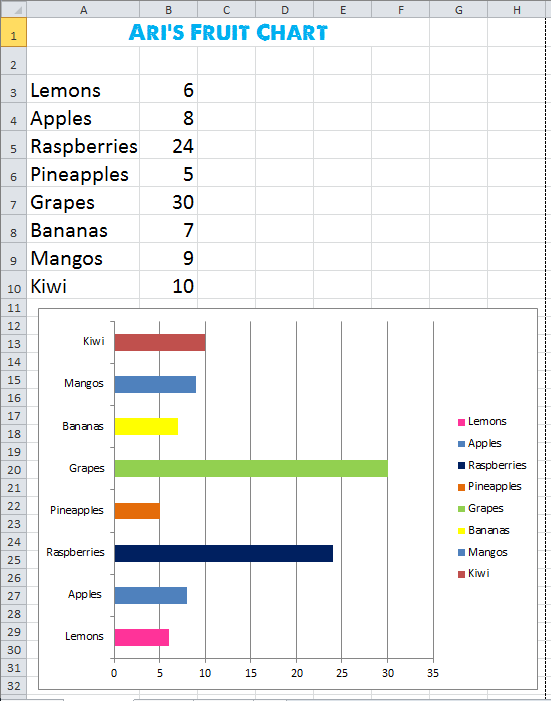
Download: fruit-stand-spreadsheet-and-chart-finished-example.xlsx
Fruit Stand Spreadsheet
and Chart Finished Example:
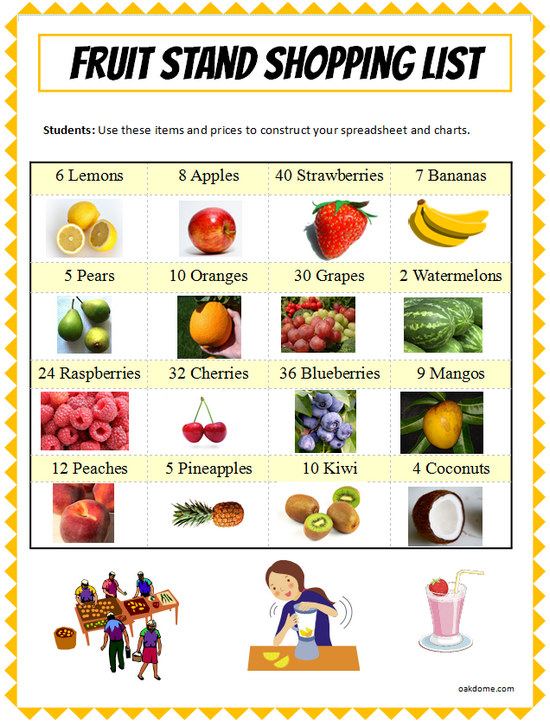
Download:excel-fruit-stand-shopping-list.pdf
Excel Fruit Stand Shopping List
Students use this list to choose items for their spreadsheet.
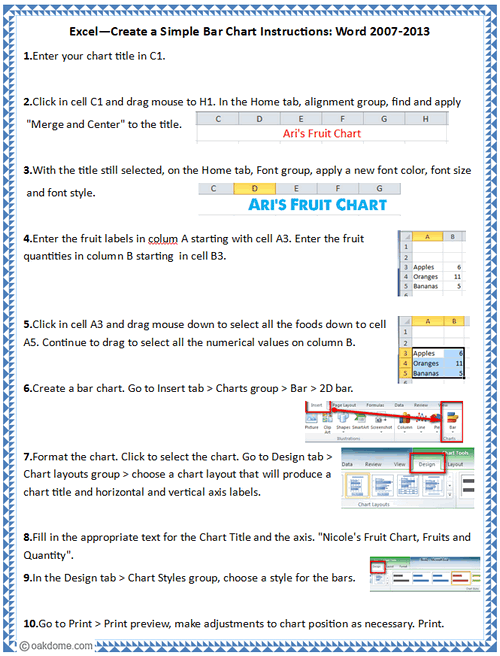
Download:excel-simple-bar-chart-instructions.pdf
Excel Spreadsheet and Chart Instructions:
Excel Spreadsheets and Charts
-
Simple
Bar Chart![Excel Simple Bar Chart]()
-
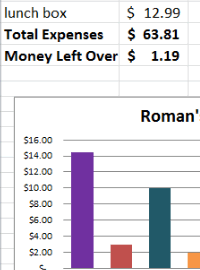
Thanksgiving
Dinner Shopping![Thanksgiving Dinner Shopping Comparison Spreadsheet]()
-
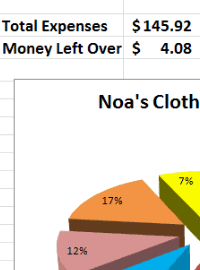
Clothes
Shopping Budget![Excel Clothes Shopping Budget]()
-
Learn Excel
in Minutes![Learn Excel in Minutes]()
-
Excel Back
to School![Excel Back to School]()
-
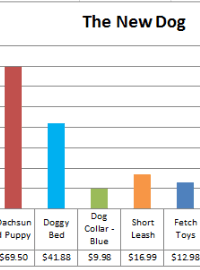
Excel Pet
Adoption![Excel Pet Adoption]()
-
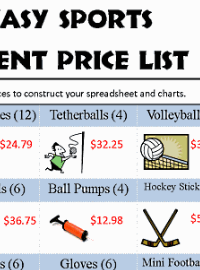
Excel
Sports Budget![Excel Sports Budget]()
-
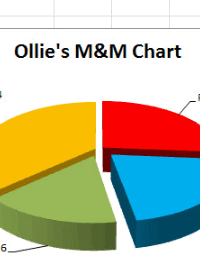
Excel
M & M Chart![Excel M & M Chart]()
-
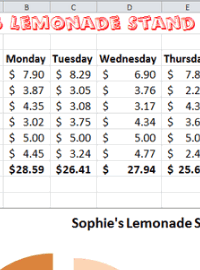
Excel
Lemonade Stand![Excel Lemonade Stand Spreadsheet and Chart]()