Make Your own Name Blinkie!
Assignment: Students create a fun and colorful blinkie animation using two free programs. Students use a free paint program to write the letters of their name and then draw rectangles around each letter. Students fill in one rectangle at a time with paint and then save the image as a .gif file with a unique name before filling in the next letter. Students then drag each letter into a free GIF animator program called UnFREEz. Voila! Name blinkie created!
Download the two free programs here:
UnFREEZ - is a simple drag and drop program that can combine multiple .GIF images into a single animated .GIF
Paint.NET - is a free drawing and paint program for windows. Use this program to create and then save the images you will use to make an animated .GIF picture.
Animated Name Blinkie Finished Example

Download: Create-an-animated-name-blinkie-instructions.pdf (same as the tutorial below).
Step One
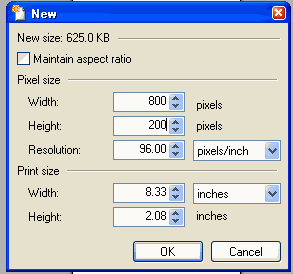
Open Paint.NET and on the Paint.NET menu bar go to File > new and set the Height to 200 pixels.

Step Two
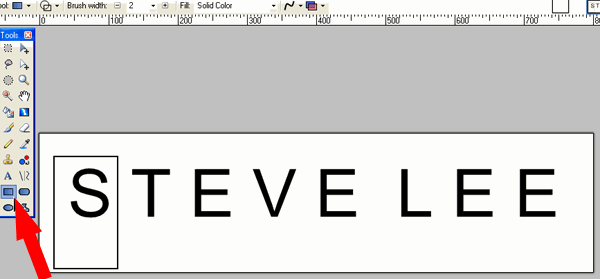
On the Tools toolbar, select the text tool (it's the "T") and type your name. Type a letter, then press the spacebar to create an extra space between each letter like this:

Step Three
On the Tools toolbar select the rectangle tool and then draw a rectangle around the letters.

Step Four
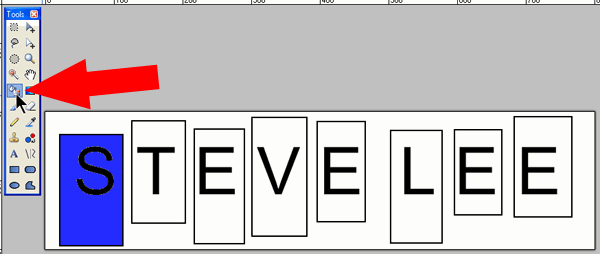
Using the rectangle tool, draw different size rectangles around each letter. After you have drawn all the rectangles, save this picture as plain.gif in a folder of your choice or directly on your desktop.

Step Five
On the Tools toolbar, select the Paint Bucket tool and fill the first rectangle with paint. Now save this image with the first filled letter as S.gif. (save it as YOUR letter's name).

Step Six
Using the Paint Bucket, fill the next rectangle with a different color of paint. Now save this image as T.gif.

Step Seven
Using the Paint Bucket fill the next rectangle with a different color of paint. Now save this image as E.gif.
See the pattern here? Continue filling each rectangle with a different color and be sure to save the image as a new letter's name each time. I save the next one as V.gif, then E2.gif, then L.gif, E3.gif, and finally E4.gif.

Step Eight
When you are finished filling each rectangle and saving each time, you will have a separate image for each letter of your name plus one extra uncolored one called plain.gif. In my case I have 9 .gif images.
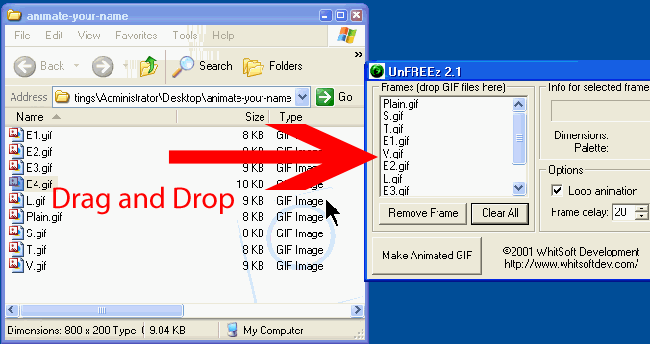
Open UnFREEz on your desktop. Drag and drop the plain.gif image into the UnFREEz window first, then drag each letter of your name in order after that.
Last, set the frame delay to 20 in UnFREEz and click Make Animated GIF.
